

Restore a test file
This step restores restore-check.txt from the verified snapshot to the independent directory C:\HFL-Restore-Test. Do not restore it to the source directory or overwrite the original file.
Choose a restore mode
- Return to Start Backup and select the Windows backup source.
- Select Restore.
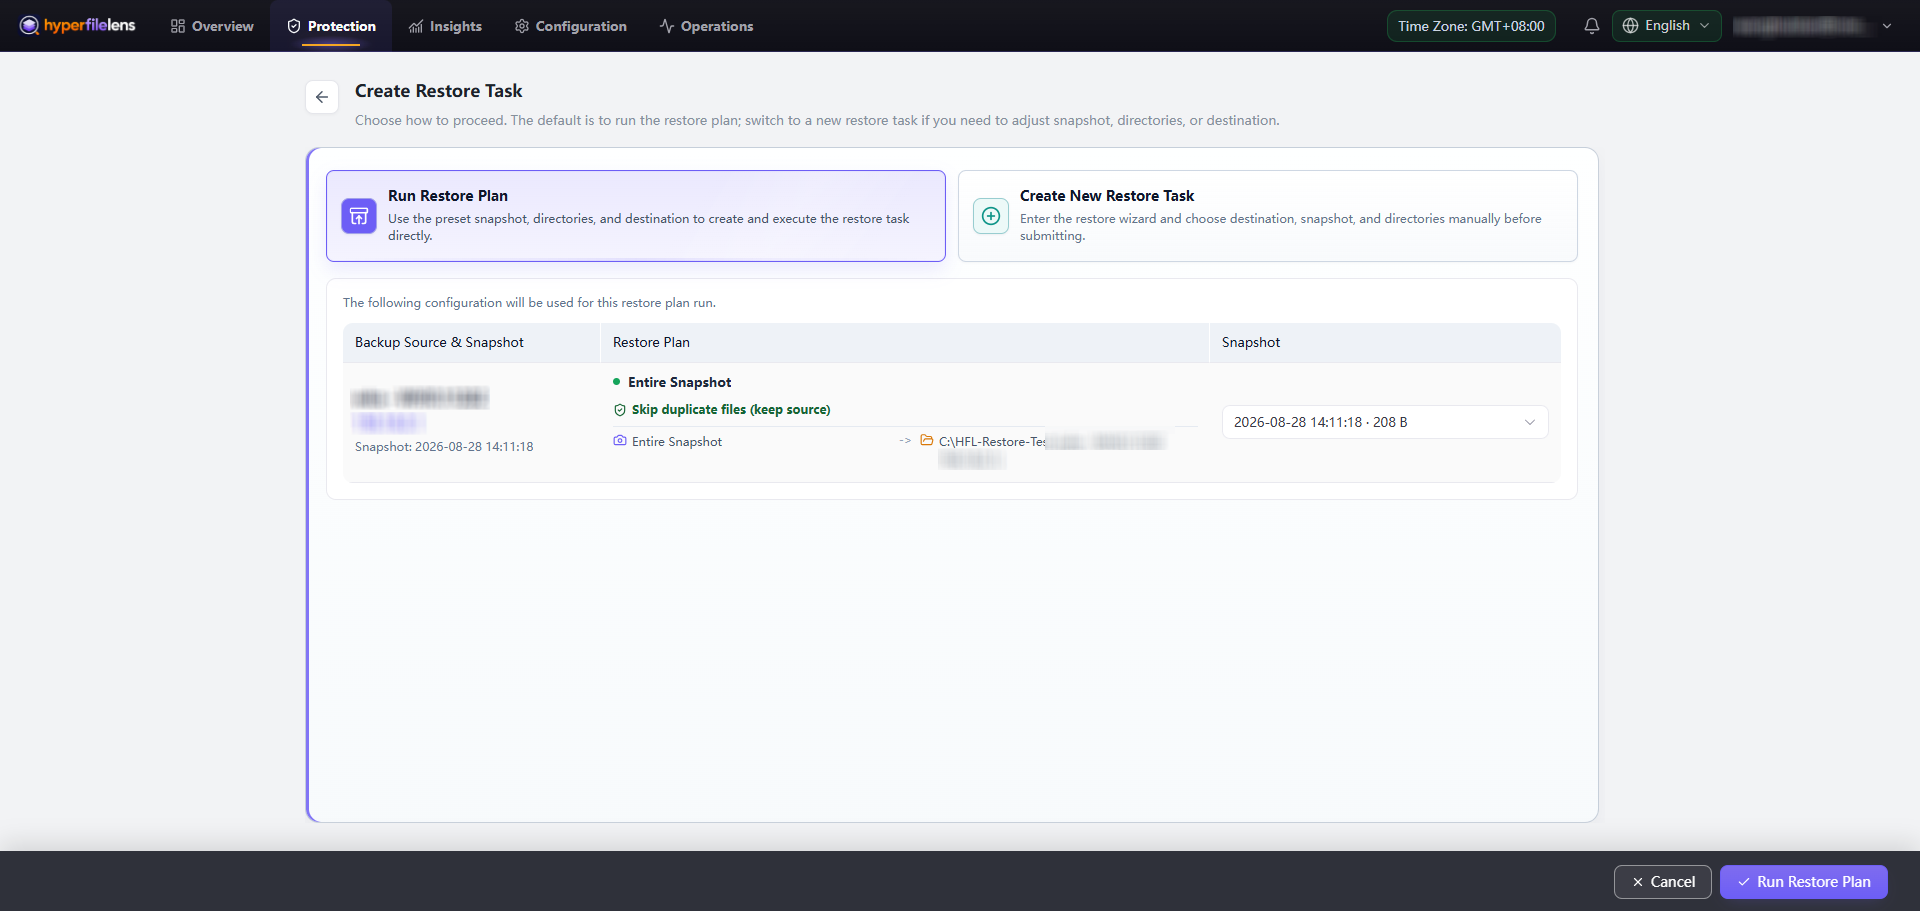
- On Create Restore Task, choose a mode:
- Run Restore Plan immediately uses the latest snapshot, scope, destination, and conflict policy preset in the backup configuration.
- Create New Restore Task lets you select the snapshot, file, and destination manually.
- Select Create New Restore Task for this single-file verification.
Create the single-file restore task
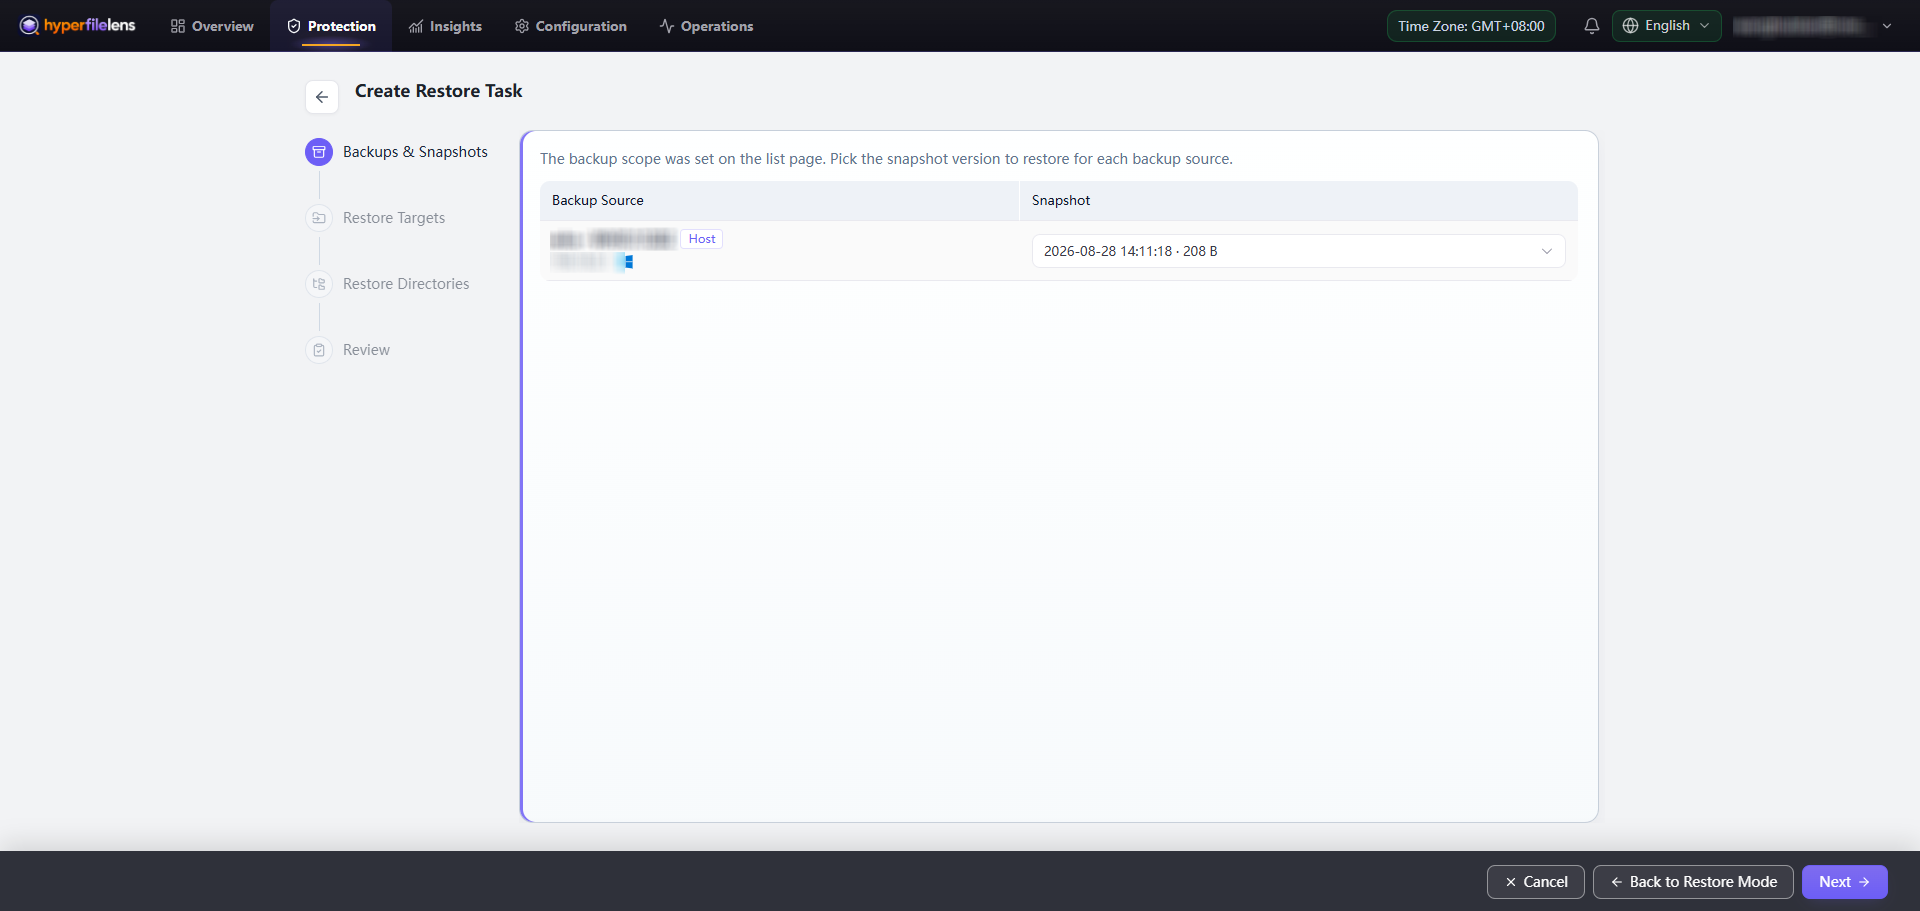
- Under Backups & Snapshots, select the snapshot you verified, then select Next.
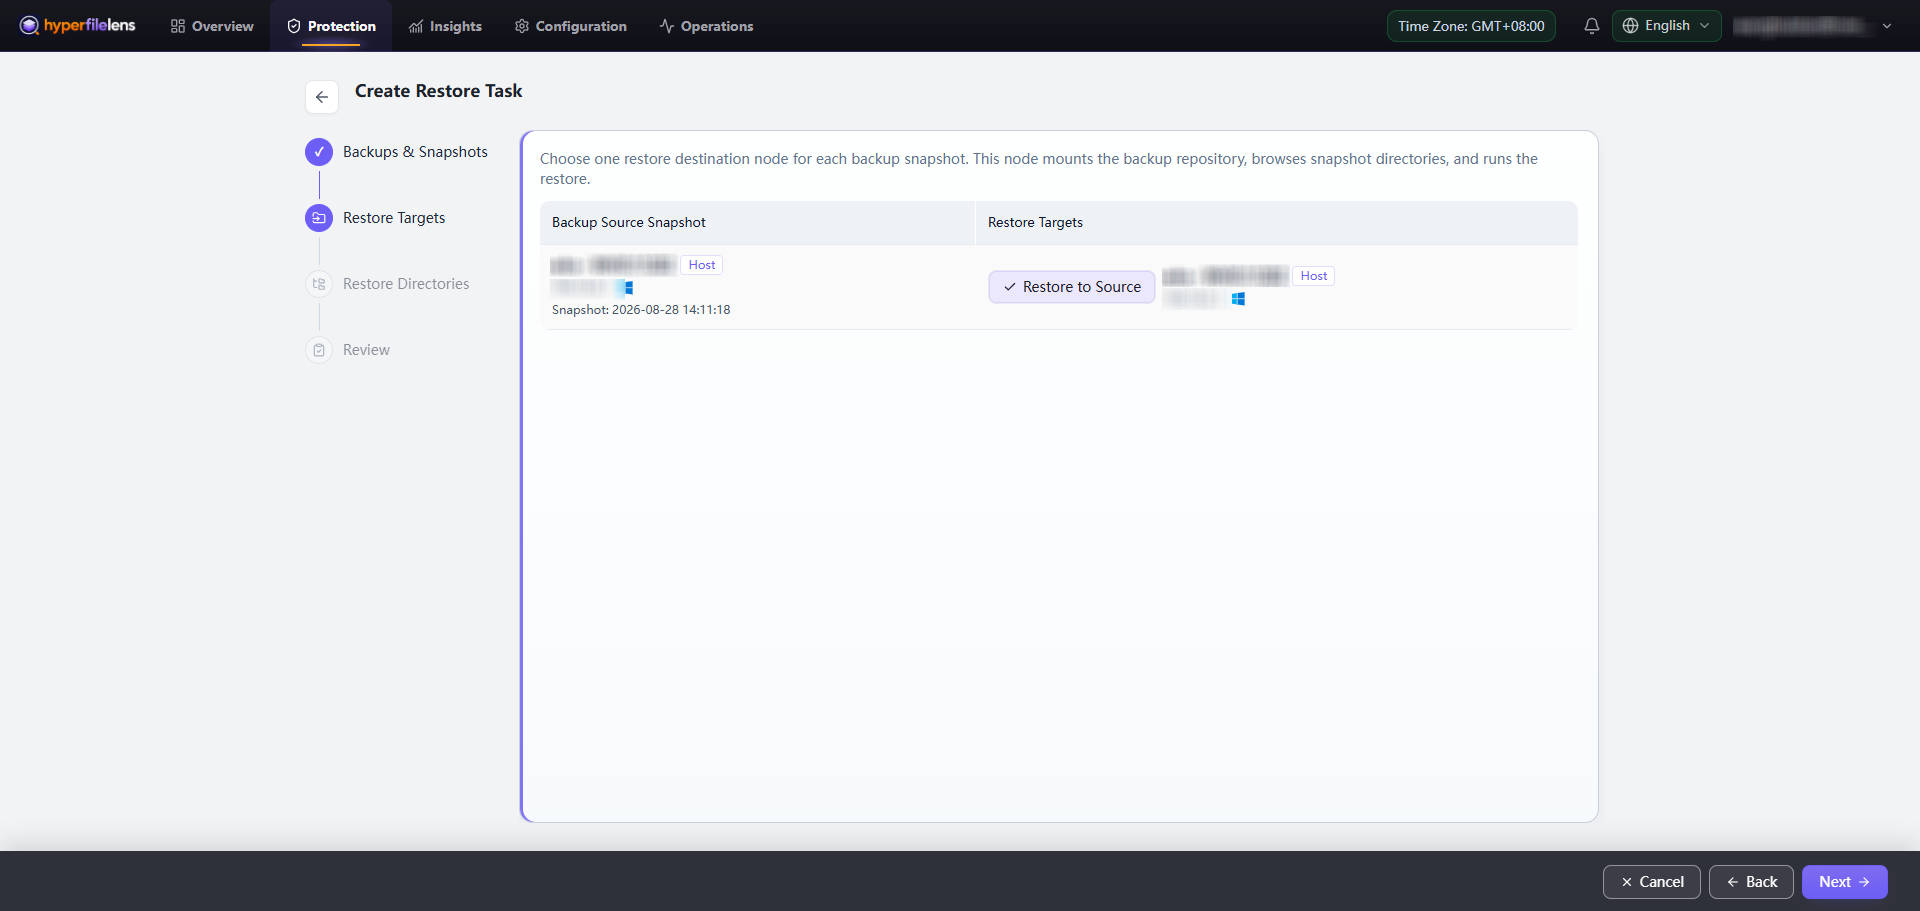
- Under Restore Targets, select the online Windows destination. This run uses Restore to Source, but restores into a separate test directory.
- Select Next.
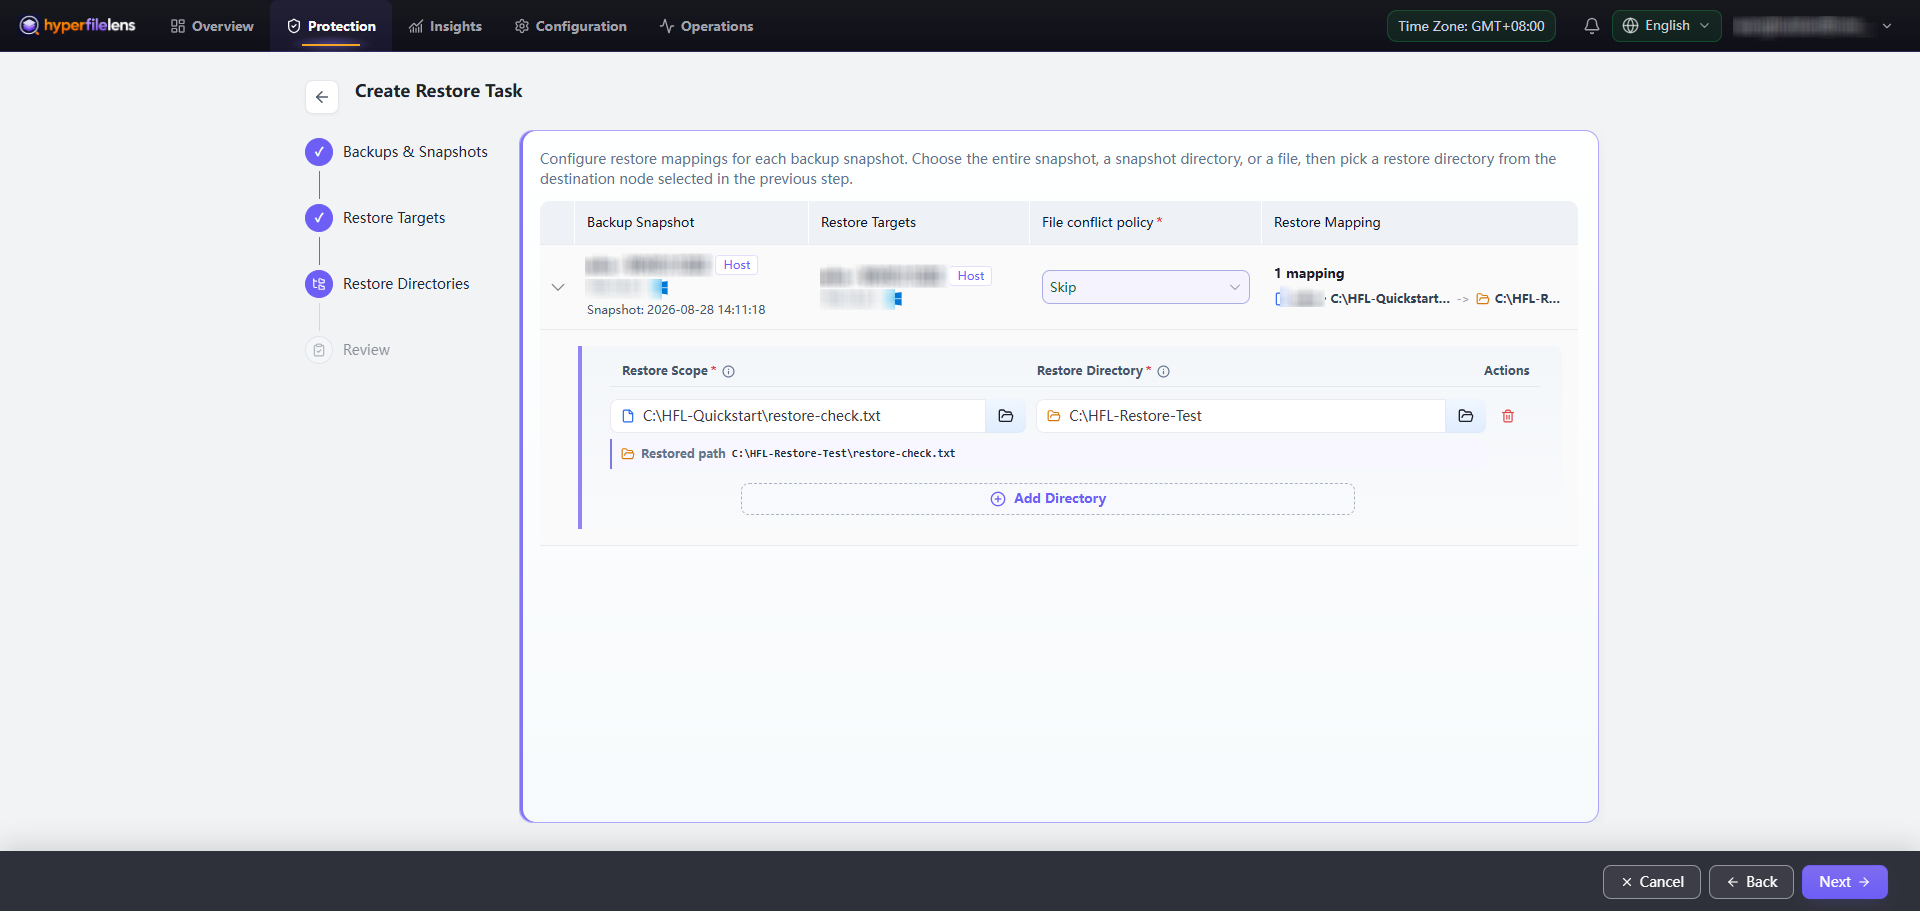
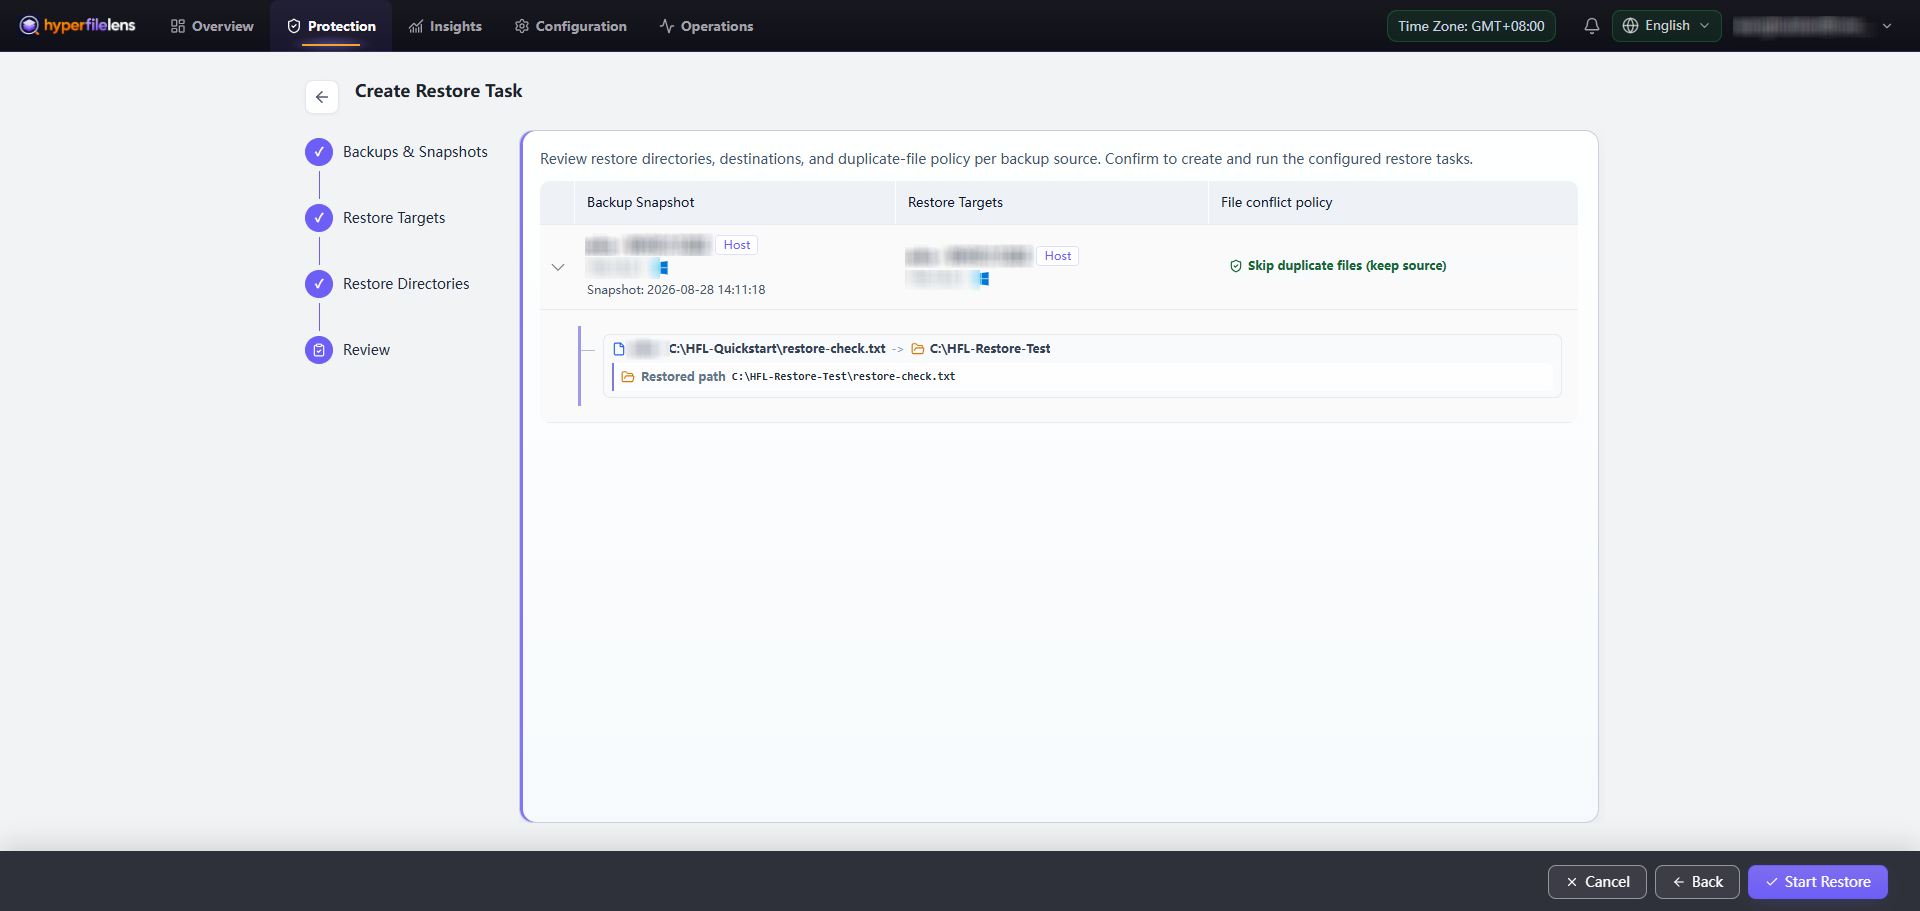
- Under Restore Directories, set File conflict policy to Skip.
- Set Restore Scope to
C:\HFL-Quickstart\restore-check.txt. - Set Restore Directory to
C:\HFL-Restore-Test. - Confirm that Restored path is
C:\HFL-Restore-Test\restore-check.txt, then select Next.
Review and run the restore
On Review, confirm:
- the correct snapshot is selected;
- the restore scope contains only
restore-check.txt; - the correct Windows target is selected;
- the restored path is
C:\HFL-Restore-Test\restore-check.txt; and - the conflict policy is Skip duplicate files (keep source).
Select Start Restore.
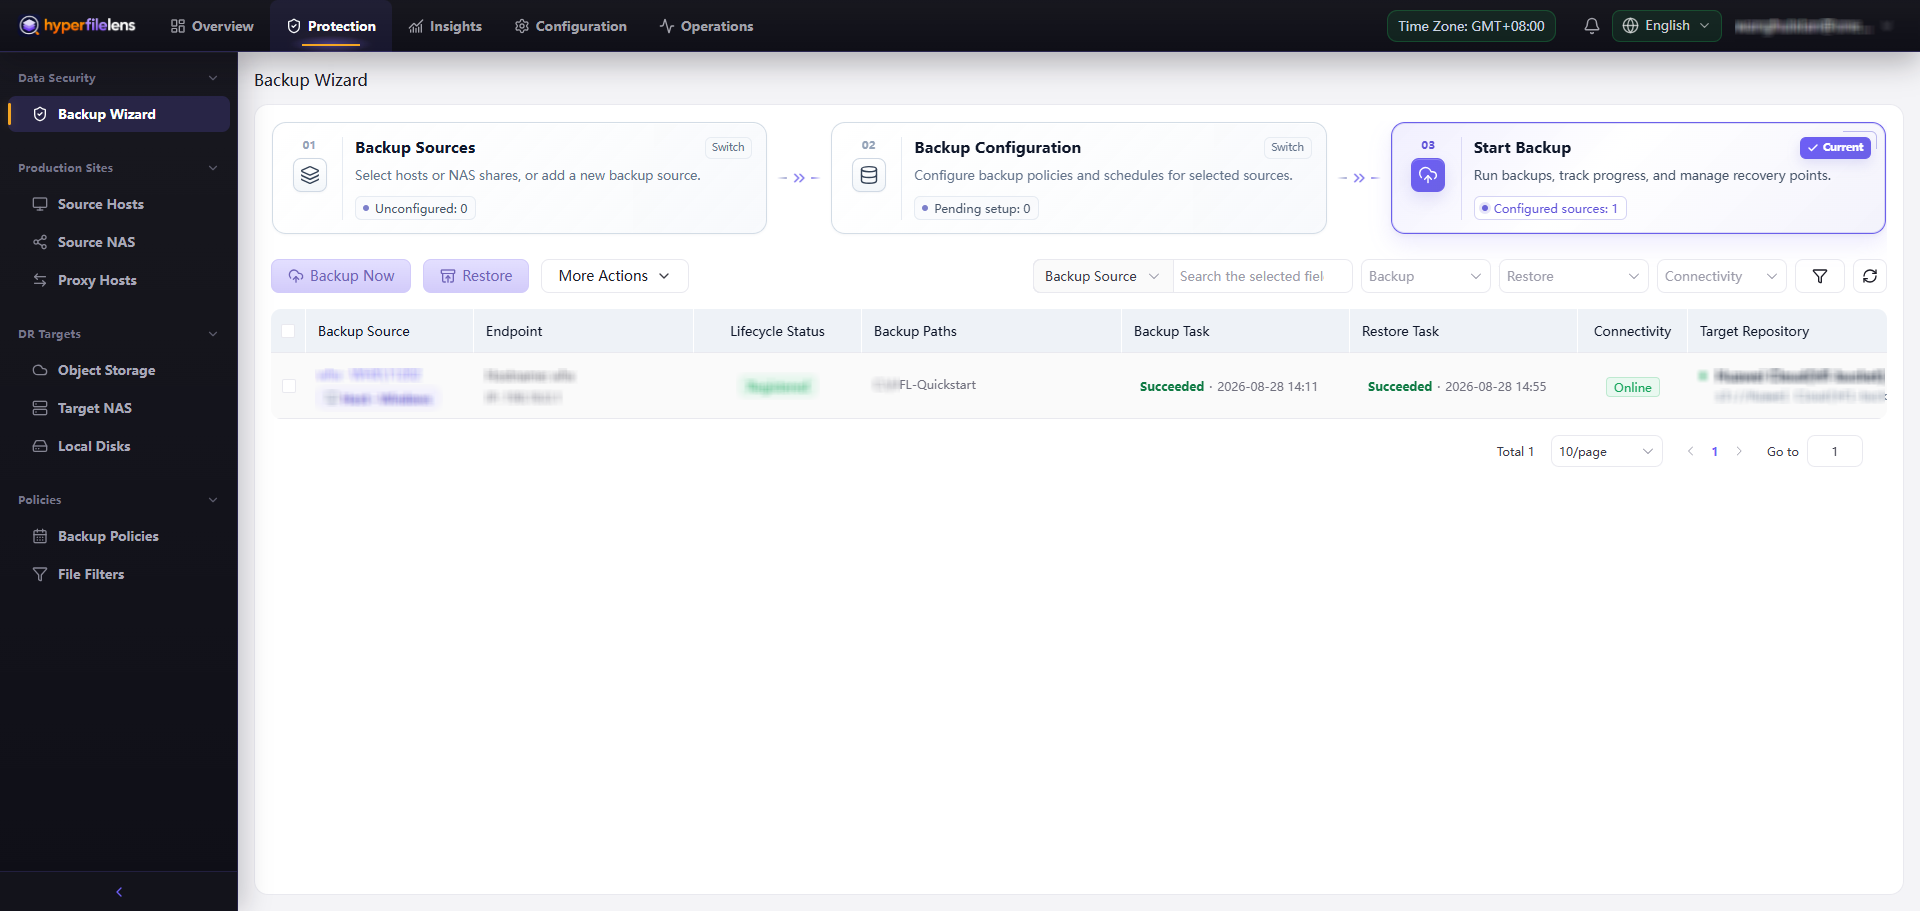
After returning to Start Backup, monitor Restore Task and wait for the status to become Succeeded.
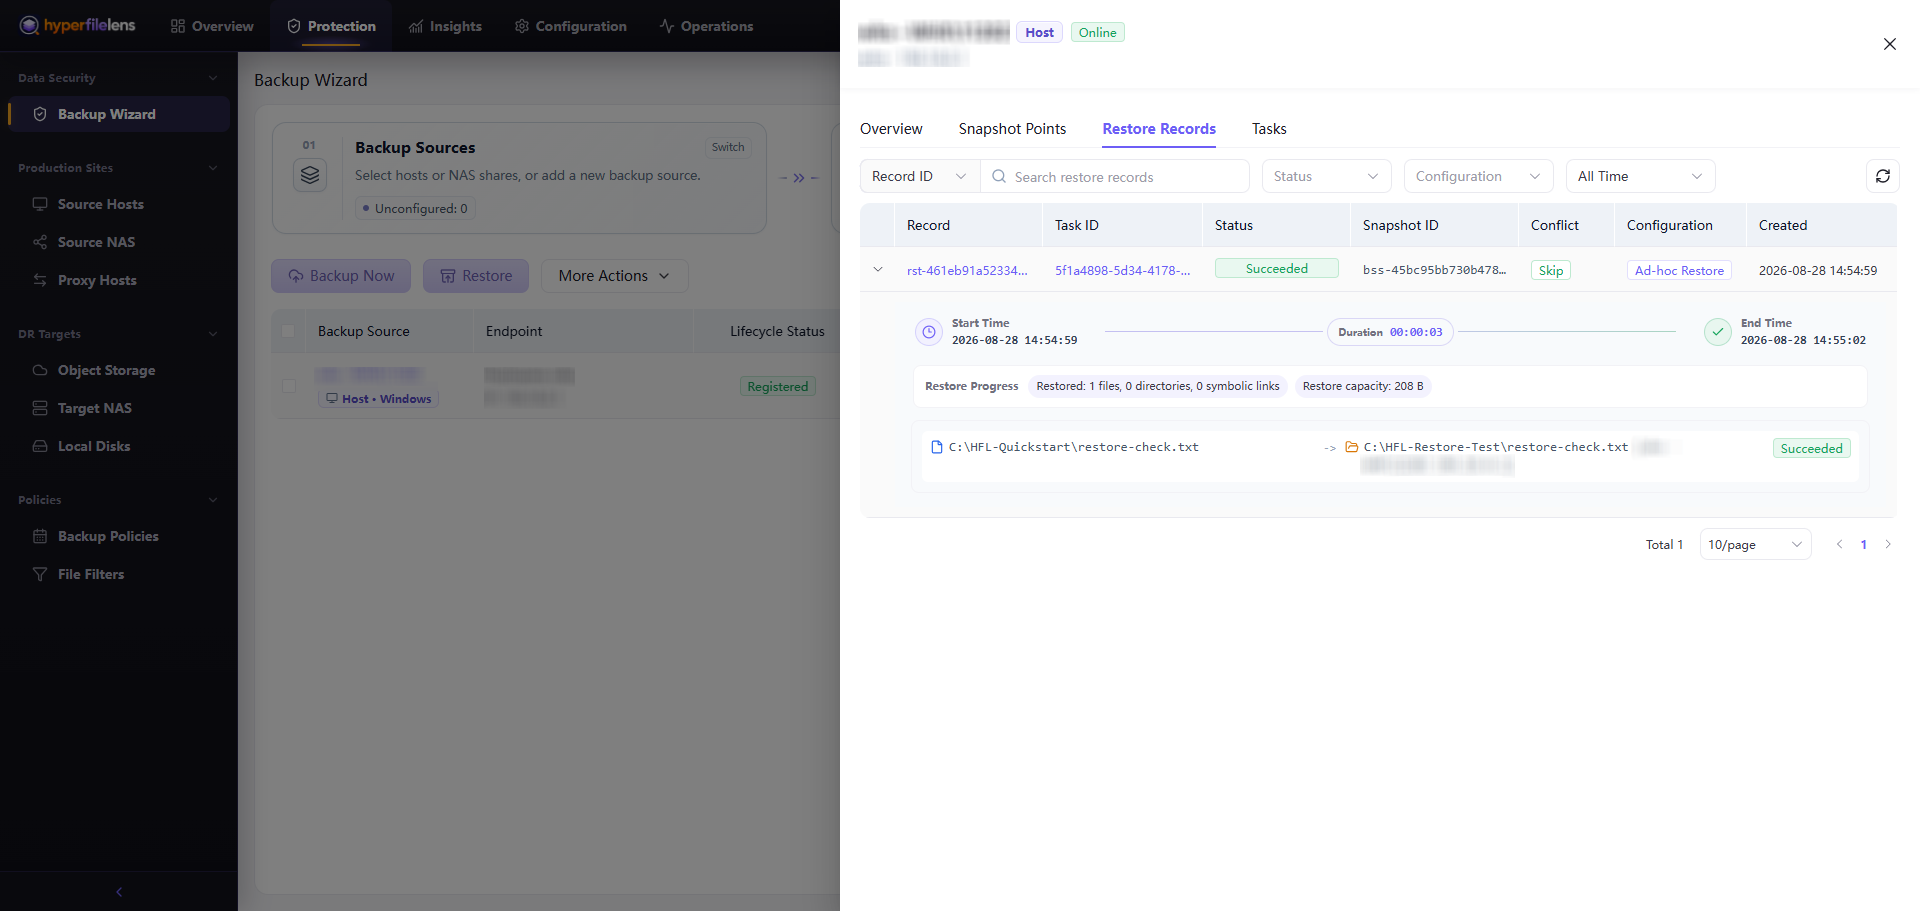
You can also open the backup source details and select Restore Records. Confirm that the record and file item are both Succeeded and that one file was restored.
Verify the file on Windows
A Succeeded status confirms that the restore task completed. Verify the restored file on Windows:
Open
C:\HFL-Restore-Test\restore-check.txt.Confirm that it contains:
textHyperFileLens restore verification Verification code: HFL-810-RESTORE-742Calculate the restored file's SHA-256 in PowerShell:
powershellGet-FileHash "C:\HFL-Restore-Test\restore-check.txt" -Algorithm SHA256Confirm that the result matches the source baseline:
textC697CF93D9D0C475F8732B99F6C4690B9B064B6774B4054C198F859AF5E35C2D
You can also open the source and restore directories side by side and compare the file name, size, and content. In this verification, restore-check.txt has identical content before and after restore.
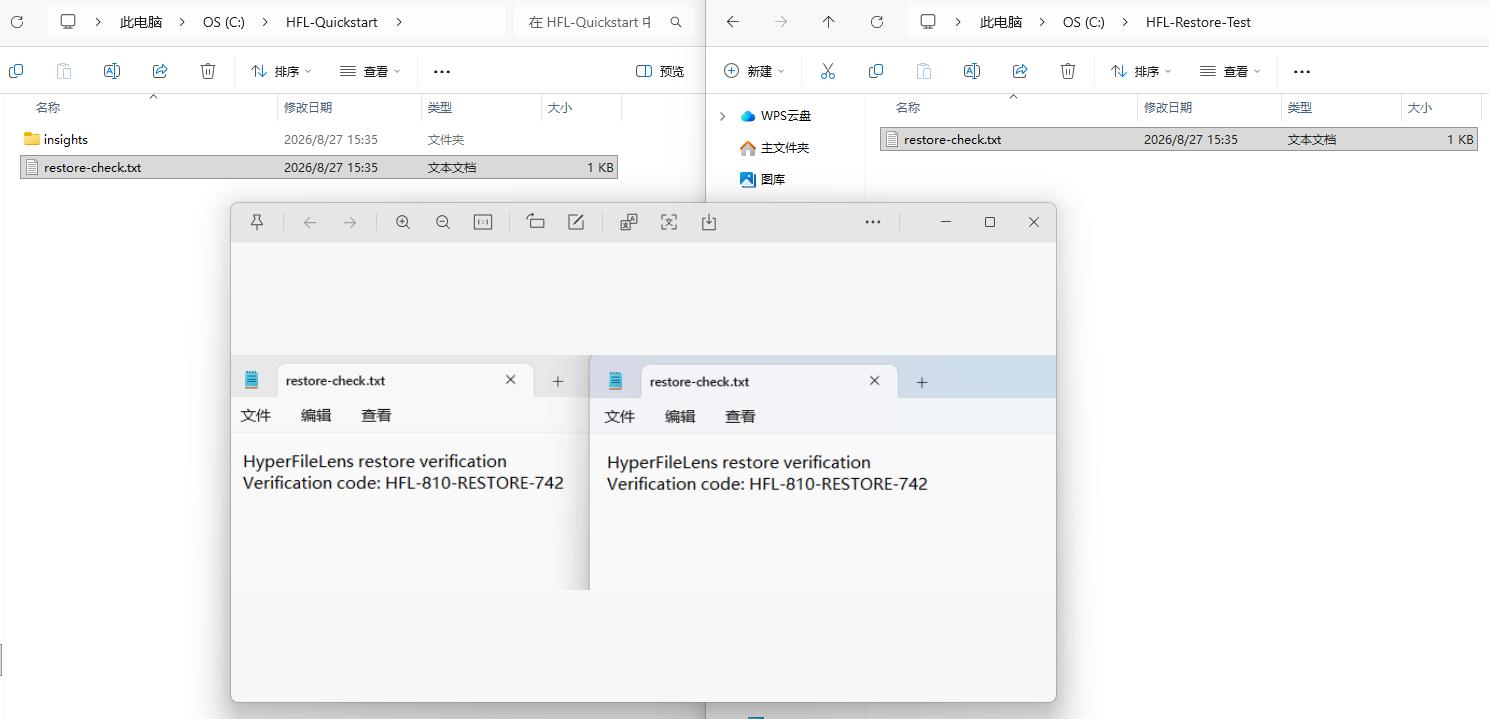
Once you have checked the restored content on Windows, the restore test confirms that the first backup is recoverable. Matching the SHA-256 baseline provides additional assurance that the restored file is unchanged.