

Create and run backups
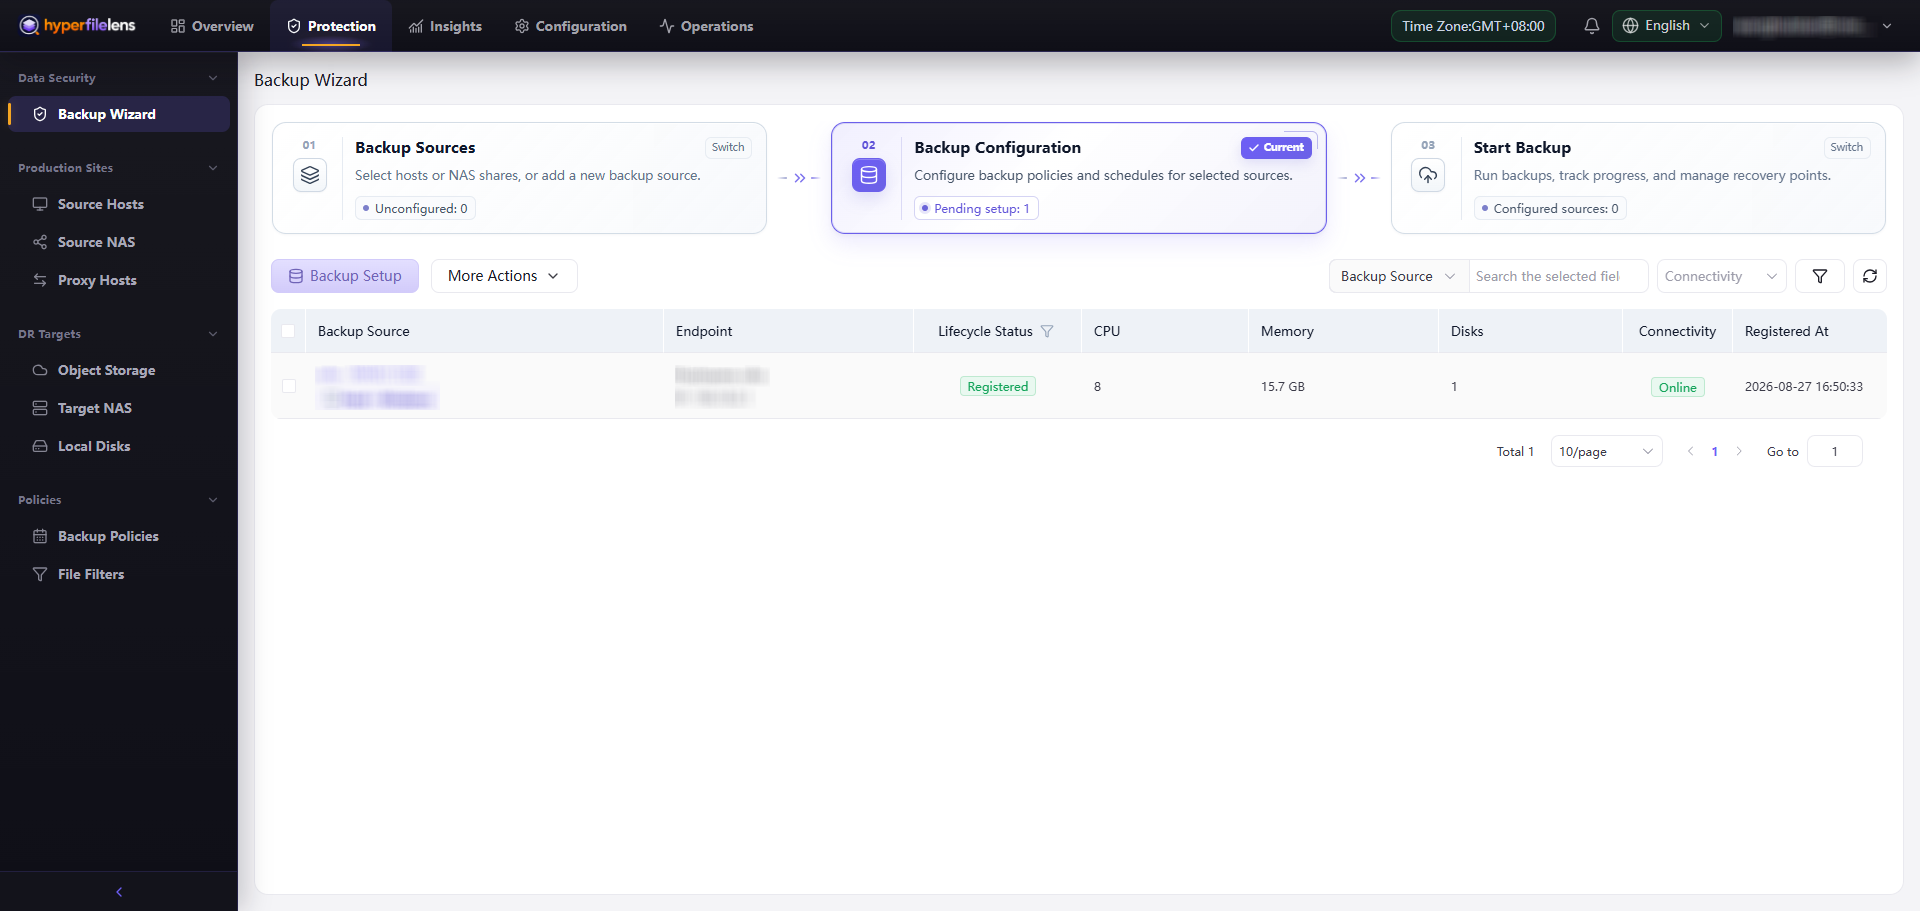
Open Protection → Backup Wizard. The workflow moves through Backup Sources, Backup Configuration, Target Storage, and Start Backup. For your first test, use a small sample dataset and run the backup manually.
1. Select the backup scope
Select an online source under Backup Sources and continue to Backup Configuration. Select the source again and open Backup Setup.
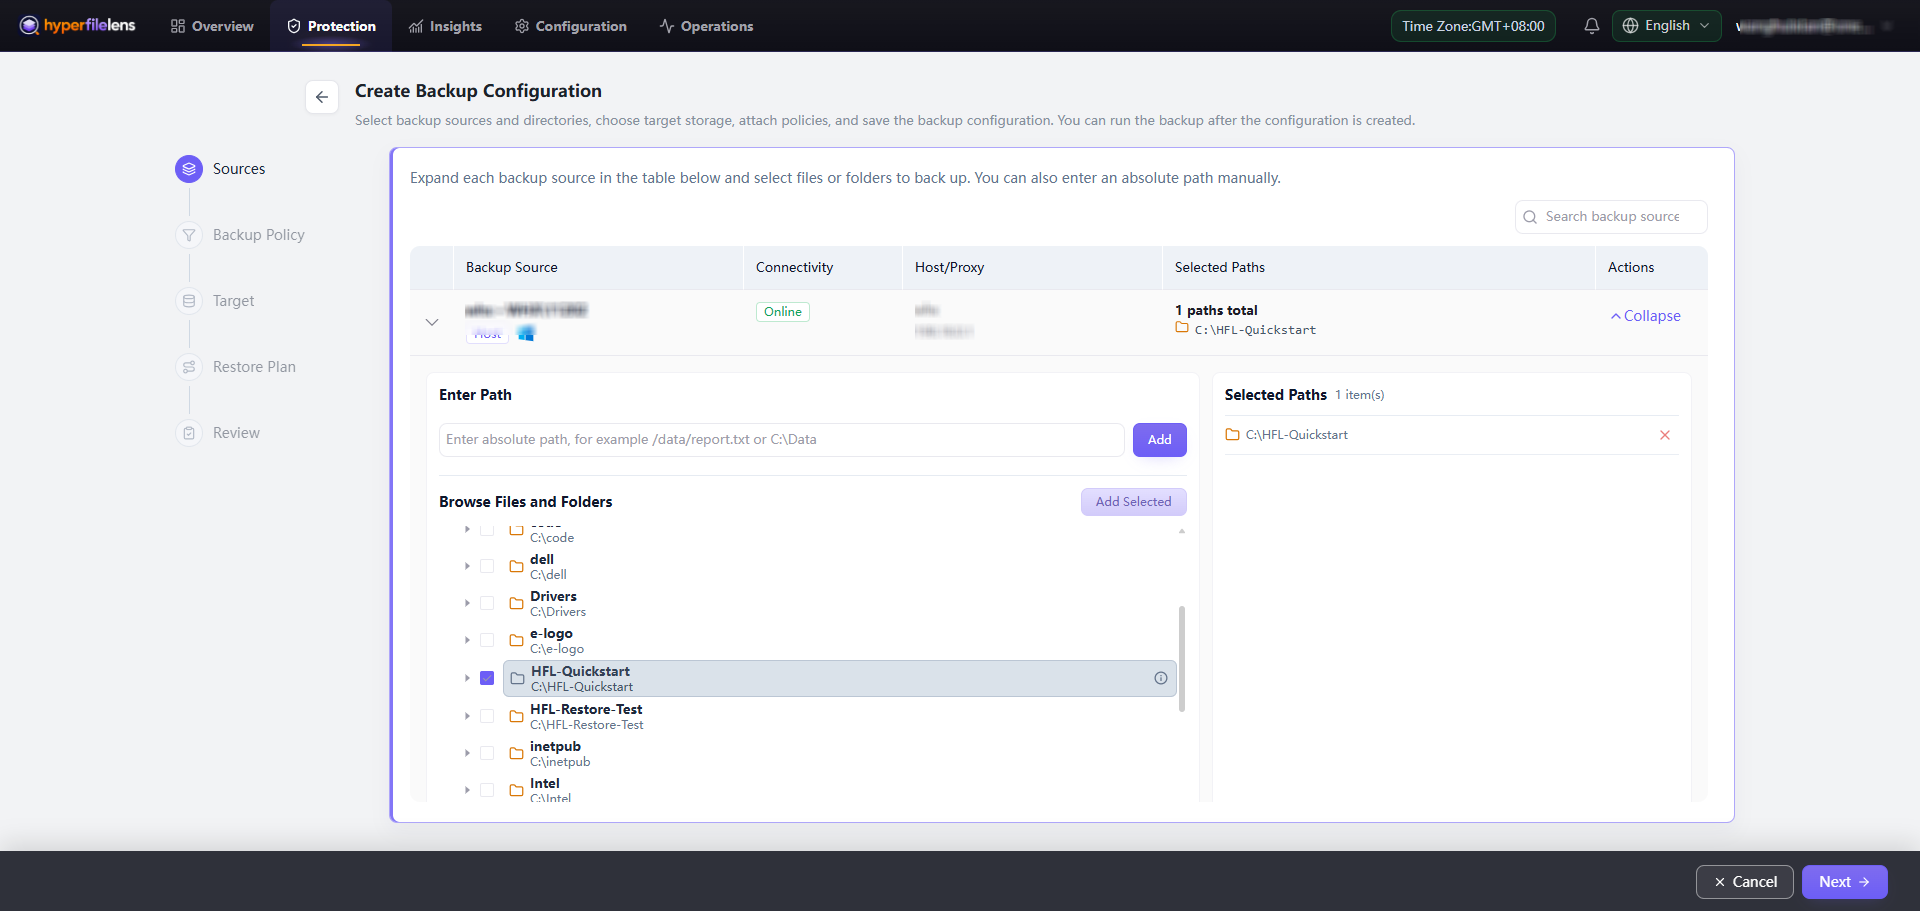
Under Sources, browse the directory tree and select the files or folders to protect. If the tree does not load, restore node connectivity and read permission rather than entering a guessed path.
Use the estimated size to detect an obviously incorrect selection. It is not a guarantee of the final transferred size or repository usage.
2. Select target storage
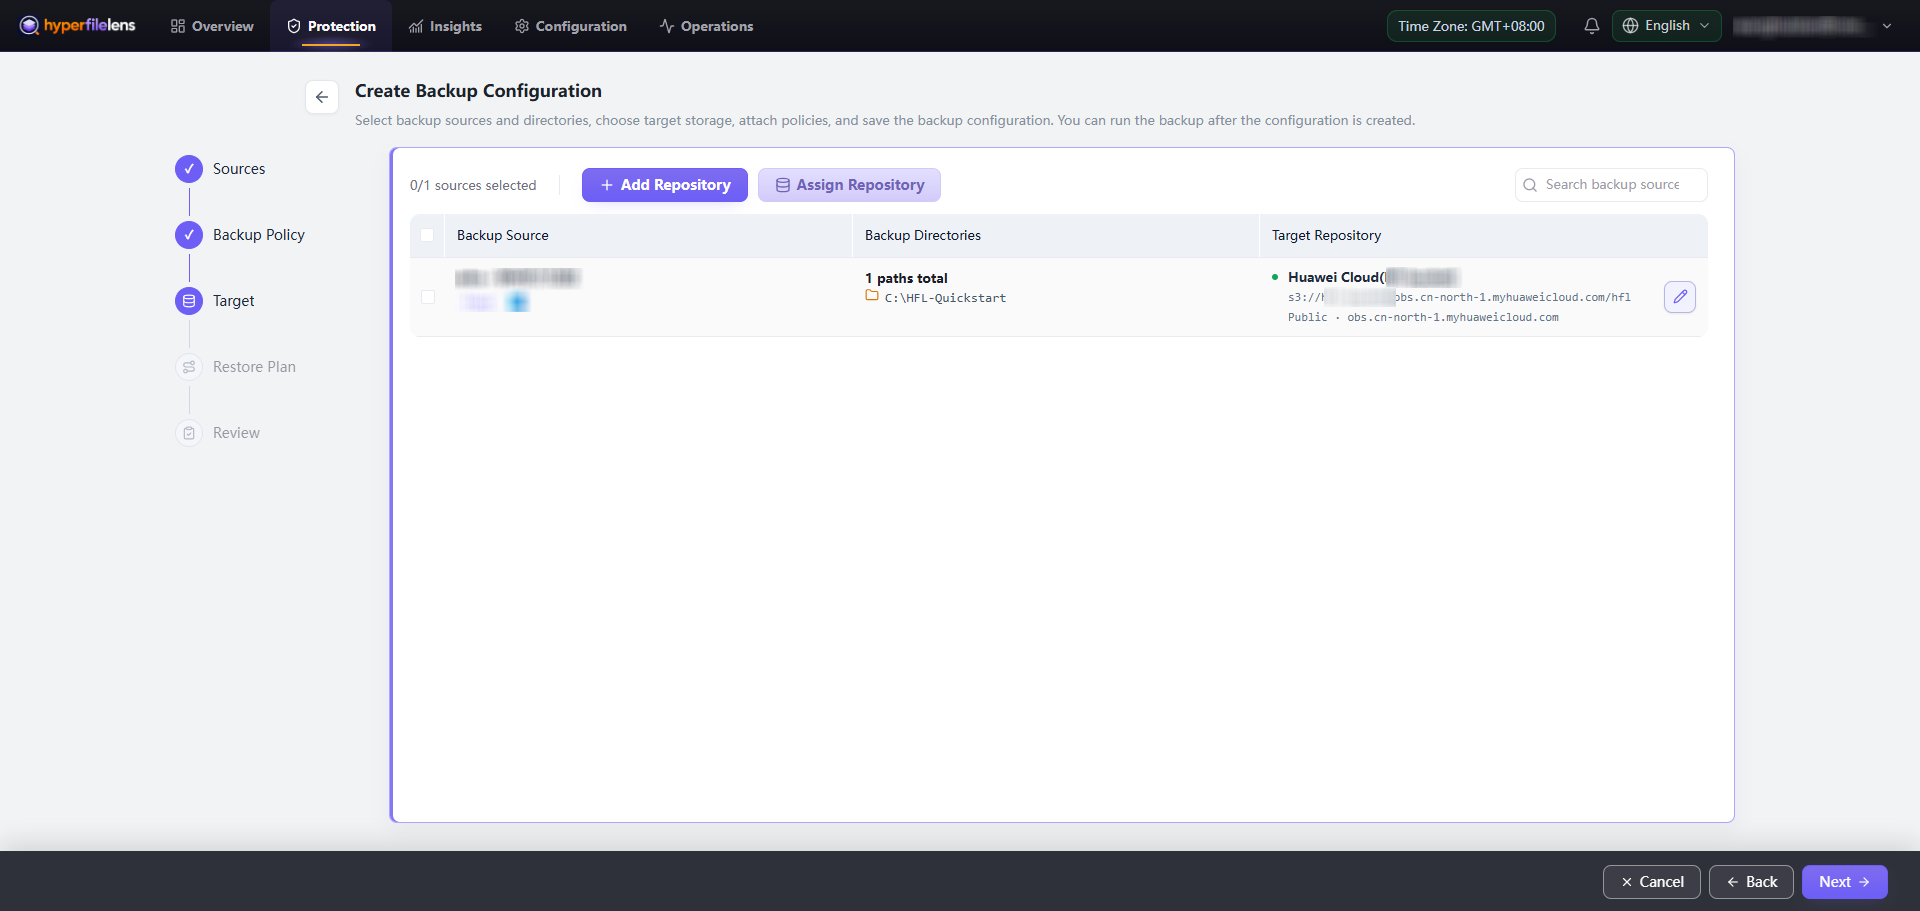
Under Target Repository, assign a compatible repository to each source. The wizard excludes targets that are incompatible with the source platform, Proxy binding, or network capabilities.
Saving the configuration validates the node, mounts, write access, repository state, and repository ownership. Resolve any reported validation error before retrying; do not create another repository for the same storage location.
3. Configure policy and filtering
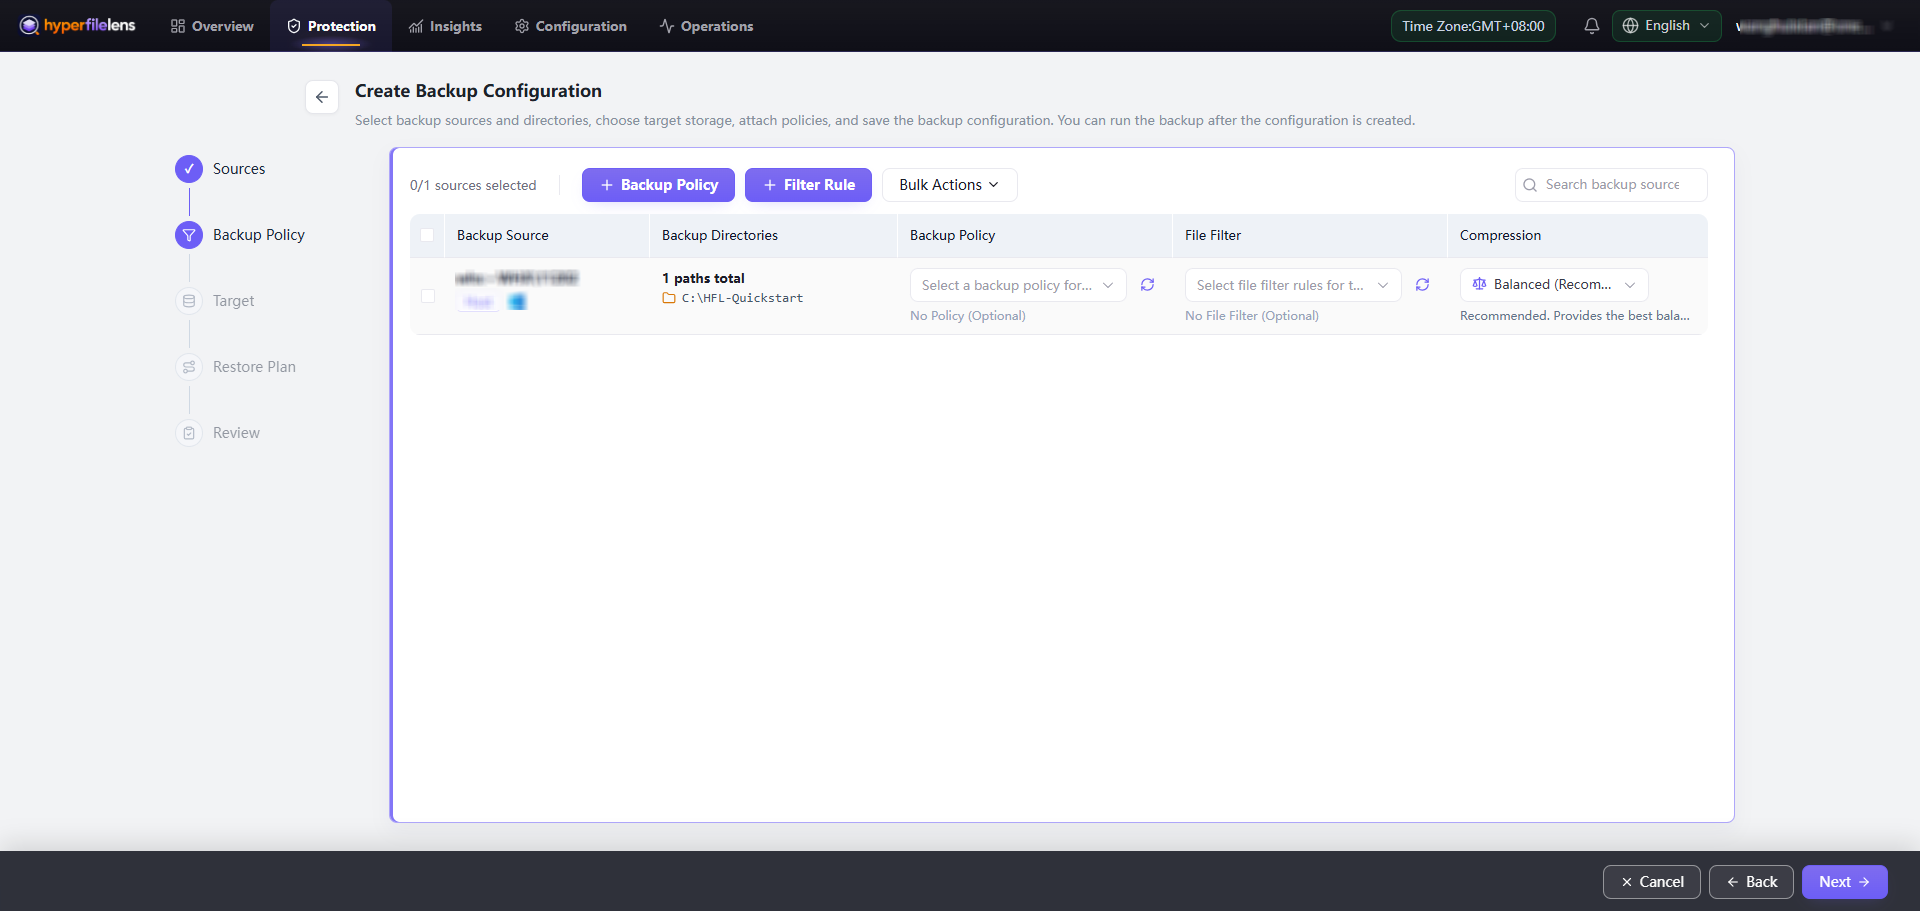
Select the Backup Policy, File Filter, and compression behavior. For the first run, leave the policy and filter unassigned and run the backup manually. Add a schedule or exclusion only after the basic path works.
Filters change which files enter subsequent snapshots. After enabling exclusions, size limits, current-filesystem restrictions, or unreadable-item handling, inspect the next snapshot to confirm the result.
4. Optionally configure a restore plan
A restore plan can preset the latest snapshot, scope, destination node, destination directory, and conflict policy. If the destination is not yet known, leave the plan disabled and use the manual restore wizard after a snapshot exists.
For the first restore validation, use an independent destination directory and Skip. Do not preset a plan that overwrites source files.
5. Review and run
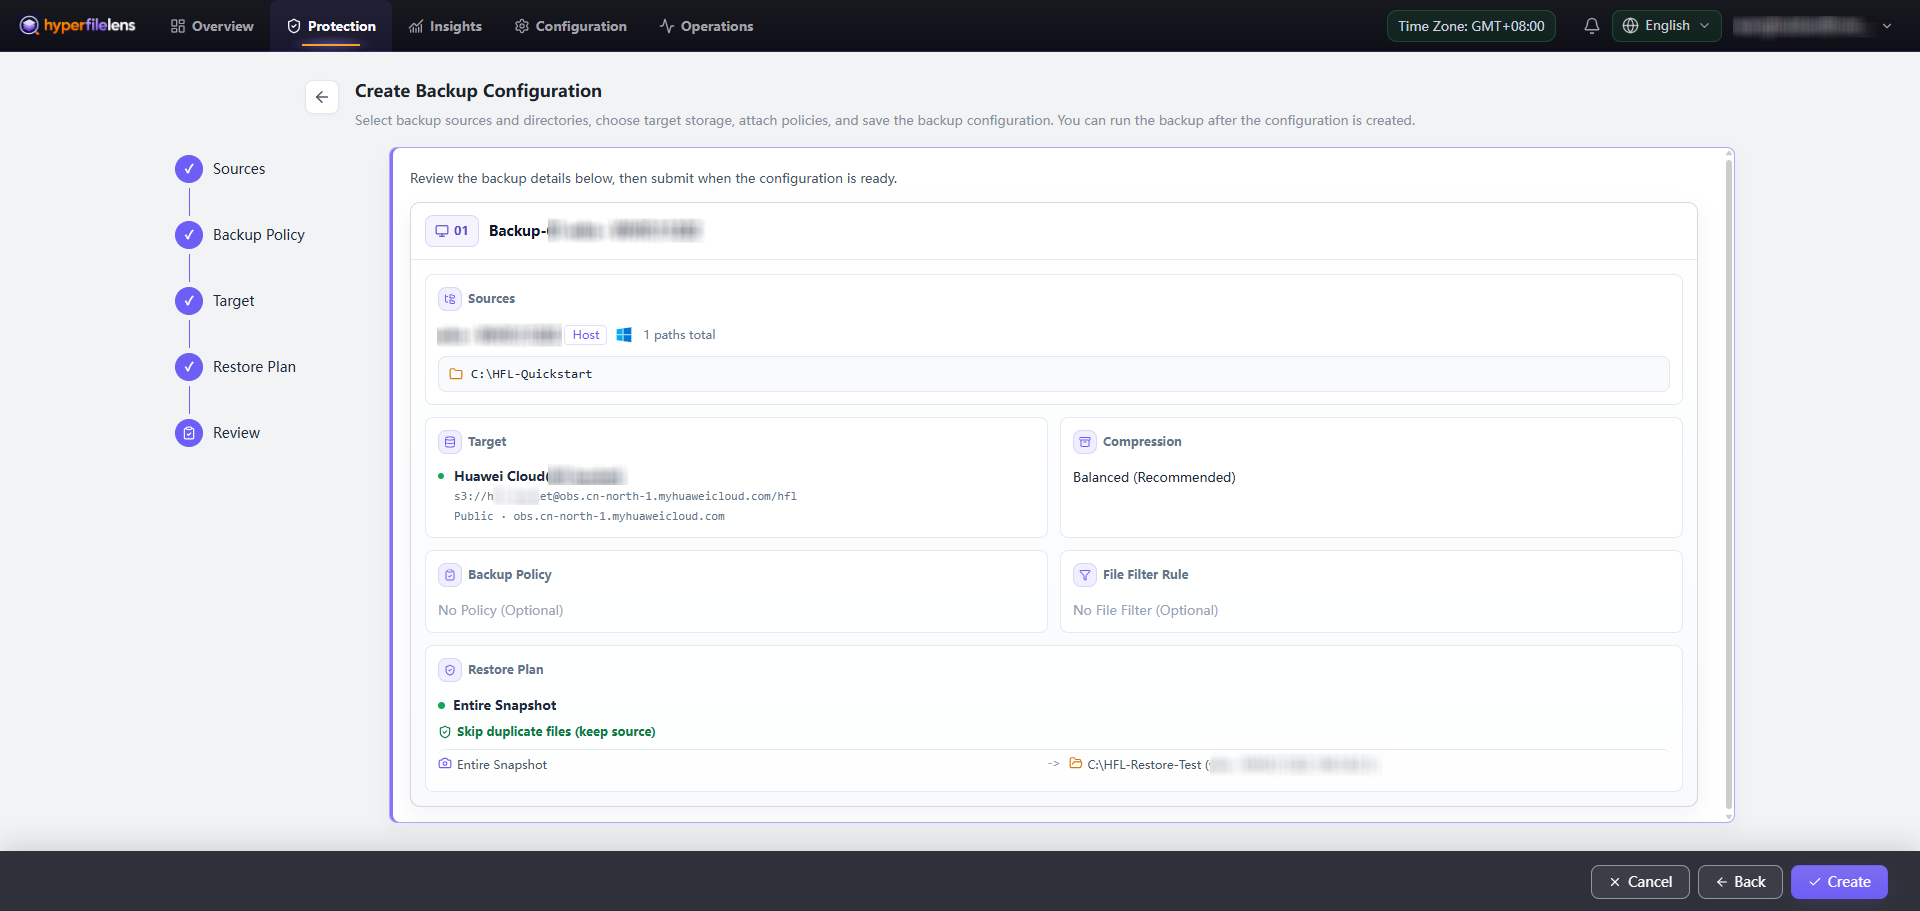
On Review, check the source, backup paths, target repository, compression, policy, filter, and restore-plan settings, then select Create.
Back on Start Backup, confirm that repository Connectivity is Online, select the source, and choose Backup Now. Wait for Backup Task to become Succeeded.
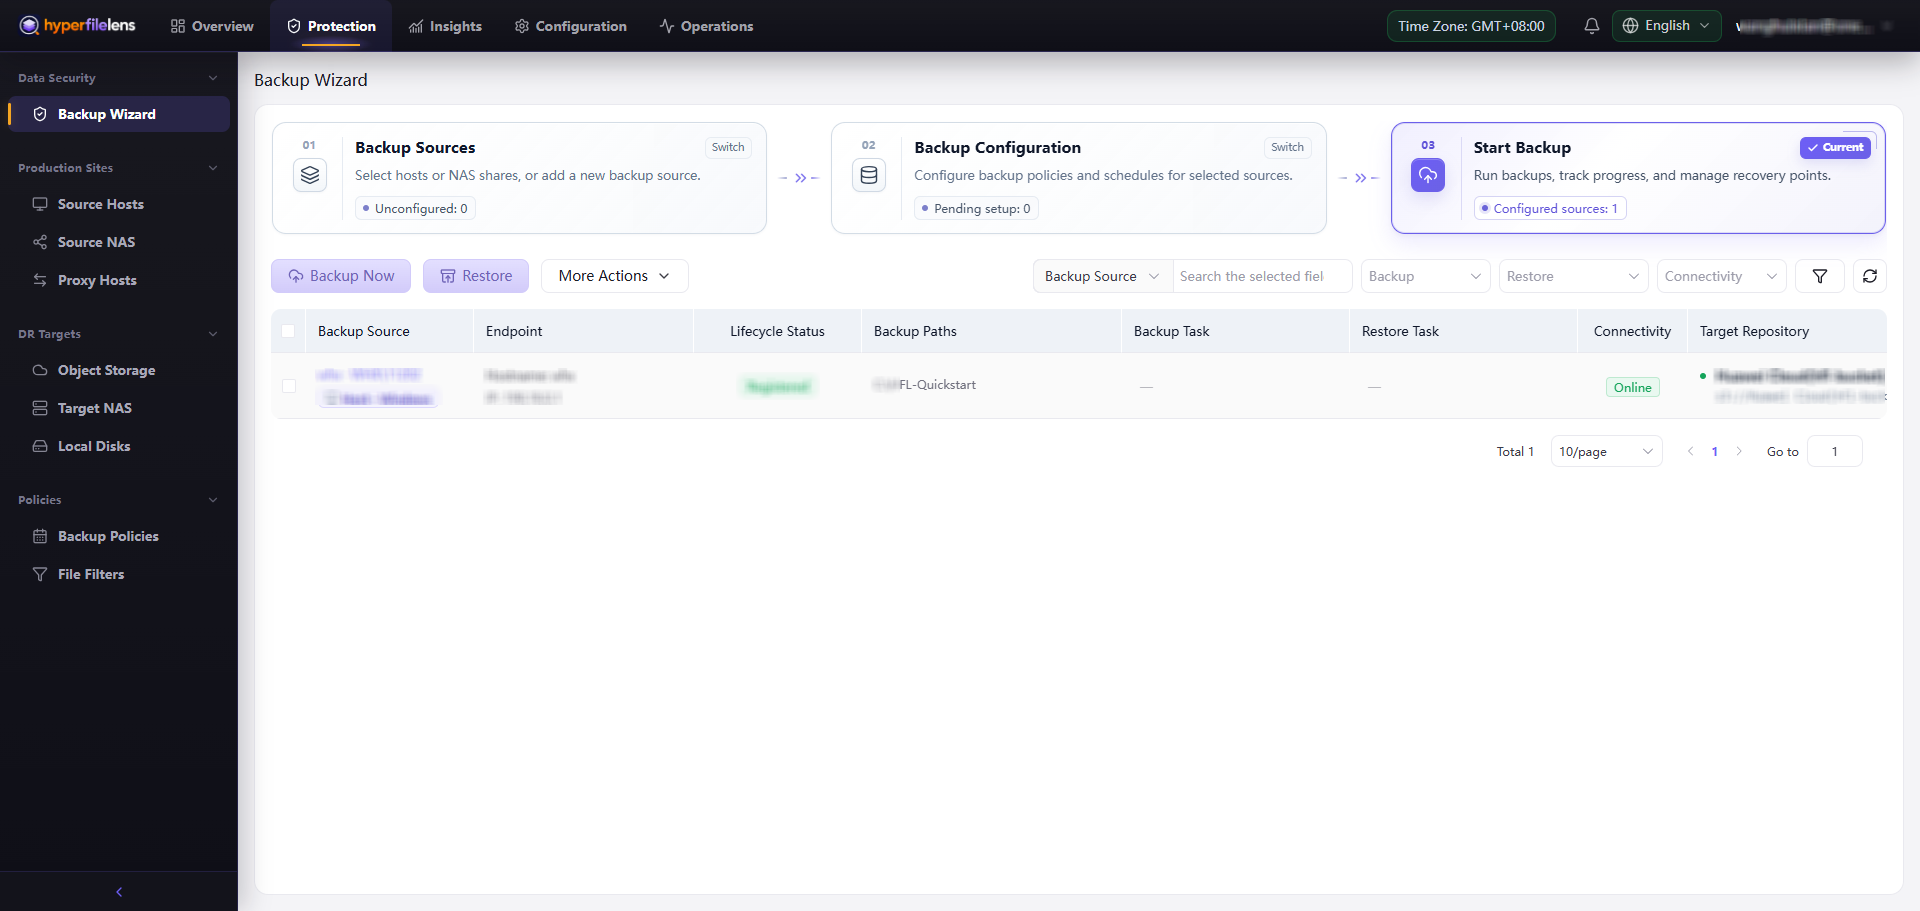
Do not stop the Agent, unmount a NAS, or change storage credentials while the task is running. Continue with View tasks and snapshots after the task finishes.